Creating a Custom OS Template for Windows
An organisation administrator can build a Customised OS Template for creating remote desktops. It’s also a practical way to activate your own OS licence.
Following these steps carefully is key to a successful image. Proceed with caution.
Important:
About Disk Partition
1. The custom template supports either a single partition or two partitions: an EFI/Boot partition and a system/data partition.
2. LVM partitions aren’t supported—avoid using them.
3. An incorrect partition layout will break auto-resizing and machine naming.
Windows
1. Install "Red Hat VirtIO SCSI pass-through controller
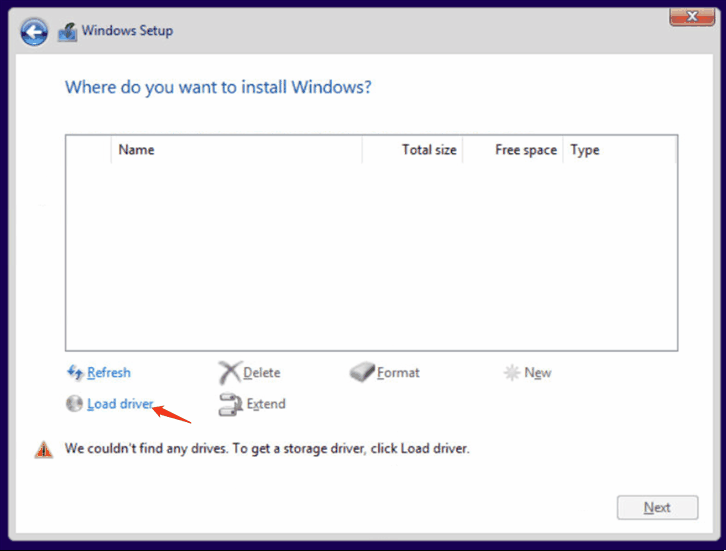
When you see the “Where do you want to install Windows?” prompt, click “Load drivers” and select the correct driver. The storage drive will then appear.
2. Initial Setup
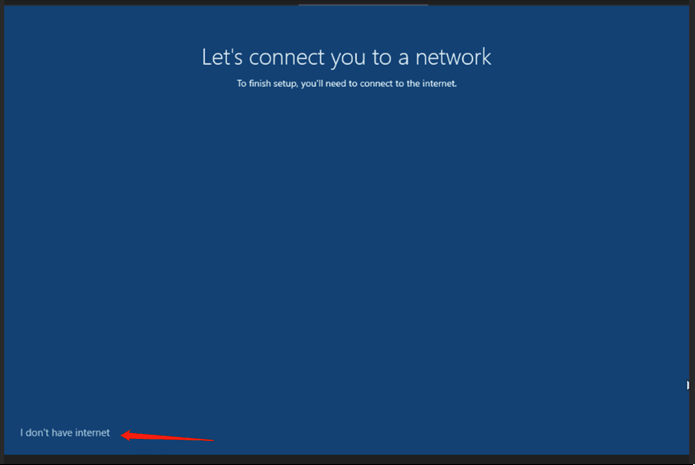
Click I don't have internet when asked "Let's connect you to a network"
Click Continue with limited setup when asked "There's more to discover..."
Pick any username and leave the password empty.
3. Install Virtio-win drivers and guest agents
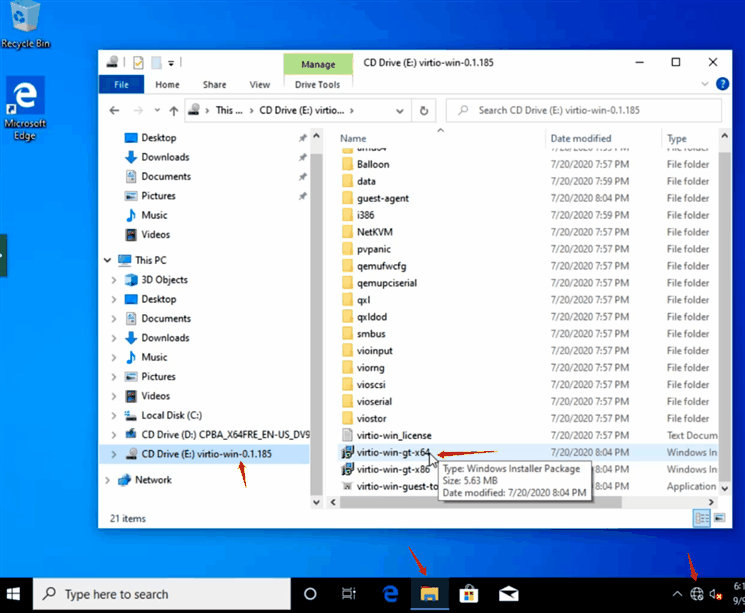
Once the machine has started and you’re logged in, open the CD Drive (E:) and run 'Virtio-win-guest-tools' to install the virtio drivers along with spice vdagent and qemu guest agent. Click Next and OK to finish.
4. Disable Hibernate
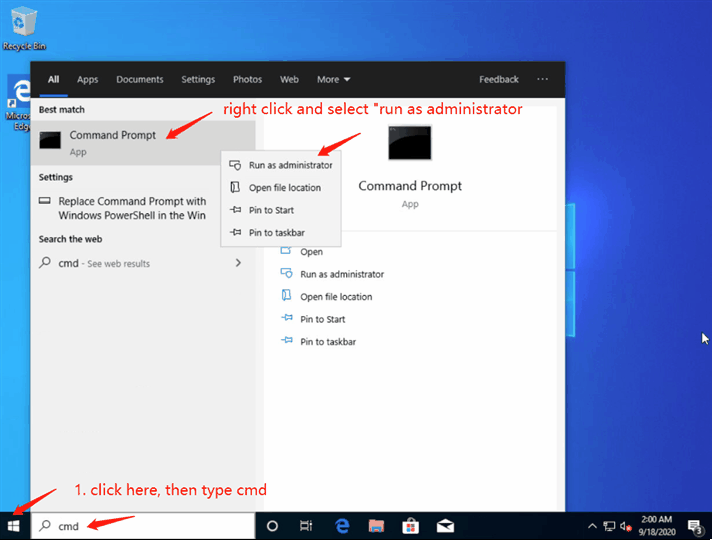
Open Command Prompt as an administrator (right-click > Run as administrator), type 'powercfg.exe /hibernate off', and press Enter.
5. Enable Shutdown/Restart Windows 10 without Any Prompts
In the registry editor, navigate to this key HKEY_USERS\.DEFAULT\Control Panel\Desktop.
Create a new String Value named AutoEndTasks and set it value to 1.
6. Check if the required service exists and set to "Automatic Start"
- Spice-Vdagent : for support of qemu vnc clipboard
- BalloonSerivce: for guest memory usage stats


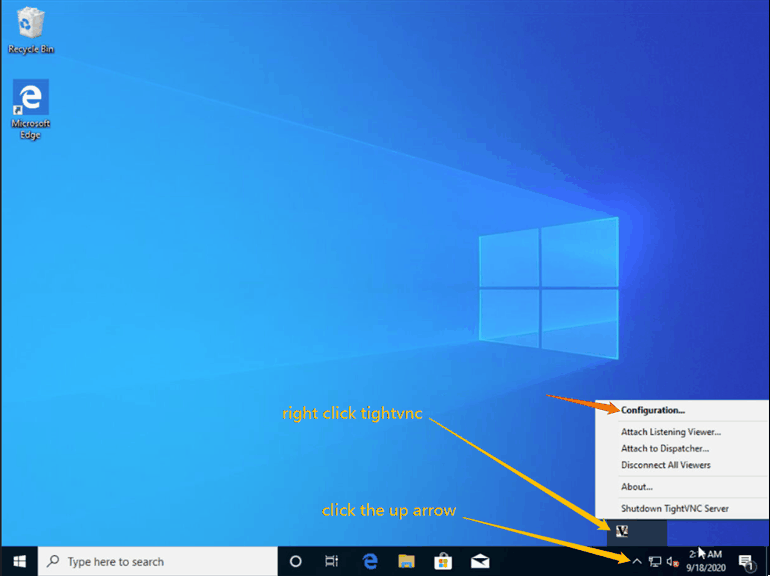
7. Install and configure Tightvnc to allow proper VNC connection
Go to https://www.tightvnc.com/download.php to download the TightVNC for Windows installer.
Install it, then disable authentication when the installation finishes.
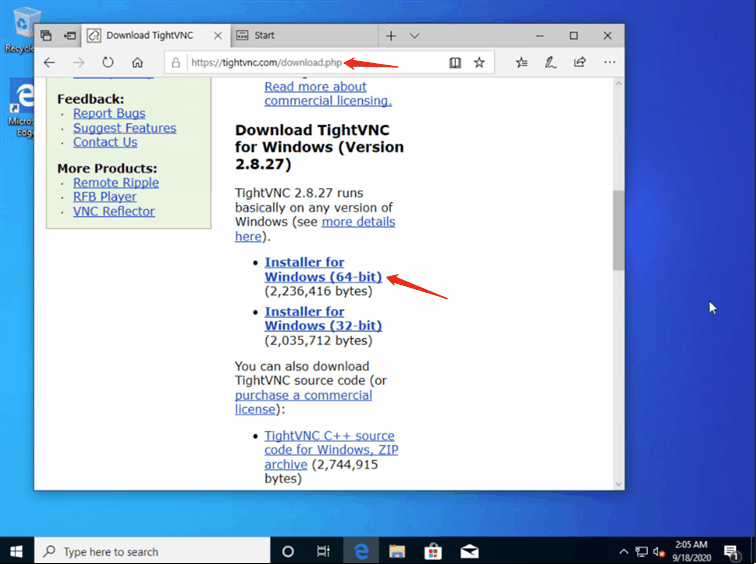
Open "TightVNC service configuration" and configure it
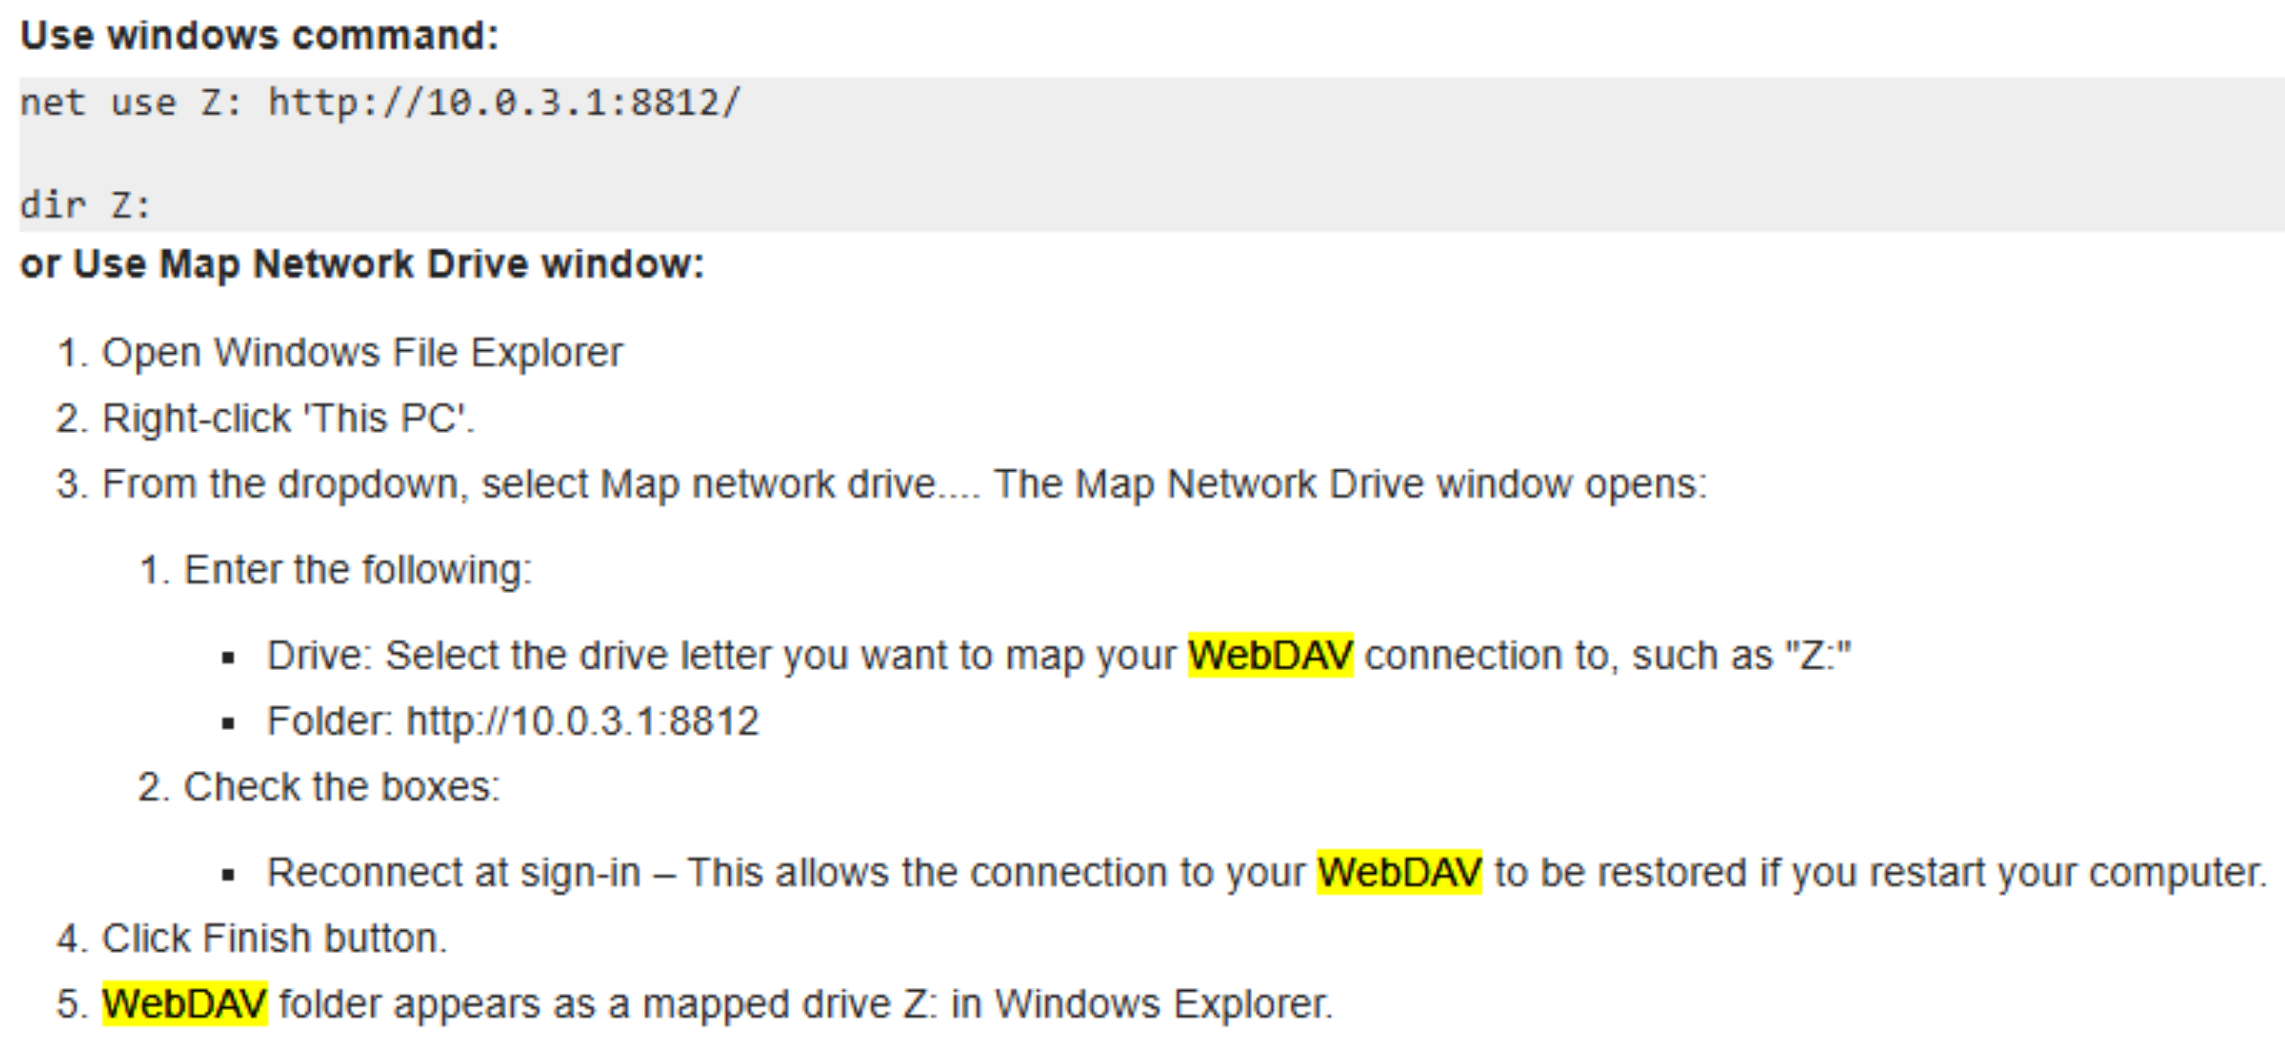
8. Enable Shared-drive
Shared-drive allows cloud desktops to share files during a training session or between a user's own PC and their cloud desktop. It works via WebDAV file sharing. You'll need to map the drive before use—see the screenshot below for steps.
9. Shutdown your Windows properly
Click the Windows icon in the bottom left, then go to Power -> Shutdown
Please Note
To add extra optional features such as
- DDWebdav to sync trainer content folders to participant machines,
- or DDUpload – for easy file uploads to a DaDesktop machine;
Please contact DaDesktop Tech Support.