Custom OS Template (Windows)
Organisation admins can craft a Customized OS Template to spin up remote virtual desktops. It additionally simplifies activating a personal license on your OS.
Following these steps is critical to generating a working image. Proceed with caution.
Important:
Regarding Disk Partitioning
1. The customized template should use a single disk partition, or two partitions: one EFI/Boot partition and one combined system and data partition.
2. LVM volumes are unsupported; please avoid them.
3. An incorrect partition layout will break disk auto-resize and machine naming features.
Windows
1. Install "Red Hat VirtIO SCSI pass-through controller"
When the installer asks "Where do you want to install Windows?", hit "Load drivers", pick the appropriate driver, and the storage drive will become visible.
2. First-time Configuration
When prompted with "Let's connect you to a network", select I don't have internet
Next, upon seeing "There's more to discover...", click Continue with limited setup
Enter any username but leave the password blank.
3. Set up Virtio-win drivers and guest agents
After the machine boots and you log in, open CD Drive E and execute Virtio-win-guest-tools to install the virtio drivers along with spice vdagent and qemu guest agent. Follow the prompts to finish installation.
4. Turn off Hibernate
Right-click to launch "Command Prompt" as administrator, type "powercfg.exe /hibernate off", and press Enter.
5. Allow Shutdown/Restart Windows 10 Without Any Prompts
In the registry editor, navigate to HKEY_USERS\.DEFAULT\Control Panel\Desktop.
Create a new String Value named AutoEndTasks and set its value to 1.
6. Verify essential services are present and configure them for Automatic Start
- Spice-Vdagent : provides qemu vnc clipboard integration
- BalloonService: collects guest memory usage statistics


7. Set up TightVNC for reliable VNC connectivity
Visit https://www.tightvnc.com/download.php to obtain the TightVNC for Windows installer.
Run the installer and, once finished, disable authentication when prompted.
Launch "TightVNC service configuration" and adjust its settings.
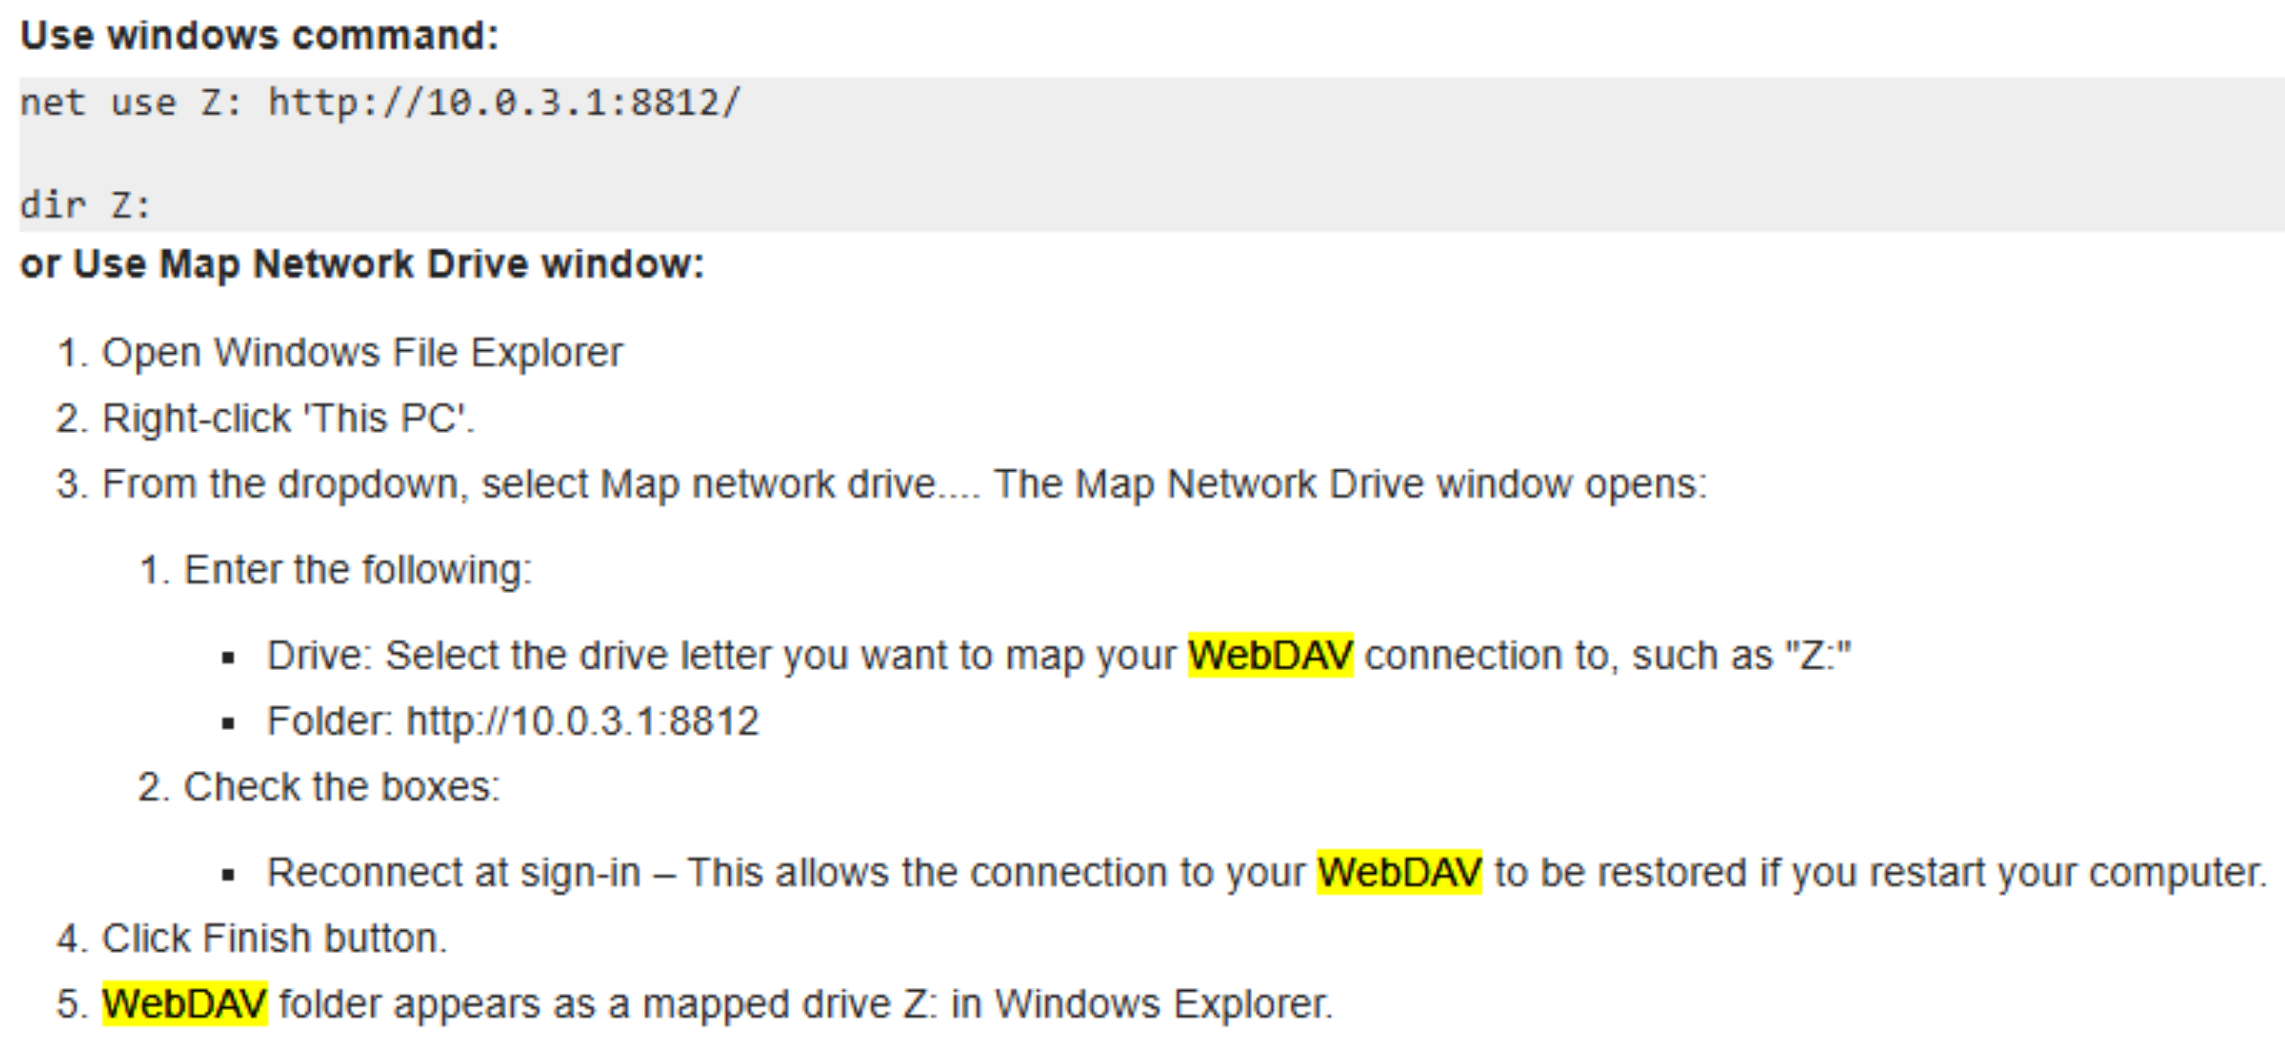
8. Activate Shared-drive
Shared-drive facilitates file sharing between cloud desktops during a training course or between a user's own PC and their cloud desktop, leveraging WebDAV technology. You must map the drive before use; see the screenshot below for guidance.
9. Shut down Windows properly
Click the Windows icon at the bottom left, then go to Power -> Shutdown.
Note
For additional optional features such as
- DDWebdav – syncs trainer content folders to every participant machine,
- or DDUpload – simplifies file uploads directly inside a DaDesktop environment;
reach out to DaDesktop Tech Support.